Headless Checkout: How It Works and Which to Choose
 Michał Miszczyszyn
Sep 24, 20269 min read
Headless checkout means the payment step of your store is reached through an API instead of a platform's built-in cart page, so a custom frontend can trigger it from anywhere: a product page, a chat window, a subscription portal. It sounds like one thing, but it is really three different patterns with very different costs. This guide covers how headless checkout works, the three ways to implement it, their real PCI and engineering trade-offs, and a decision framework for picking the right one.
What Is Headless Checkout?
Headless checkout is the checkout equivalent of headless commerce: the part of your store that collects payment is decoupled from the rest of the storefront, and a custom frontend talks to it through an API rather than rendering a page the platform gives you.
In a traditional setup, "add to cart" leads to a checkout page the platform renders end to end: same templating engine, same theme, same domain the whole way through. In headless checkout, the storefront (product pages, cart, account) can be built in any framework, and only the actual "collect card details, run the charge, confirm the order" step is handed off to a payment layer, whether that is a hosted page, an embedded component, or a form you built yourself.
The distinction matters because checkout is the one part of the store where cutting corners is expensive twice over: a slow or ugly checkout costs you conversions, and a badly built one costs you PCI compliance scope. The average cart abandonment rate is over 70%, and "too long or complicated" is one of the top reasons shoppers give up before paying. We cover the abandonment side in depth in our checkout optimization playbook; this guide is about the architecture decision that comes before it: how much of that final step should you actually build yourself?
How Headless Checkout Works
Every headless checkout, regardless of pattern, has the same three parts:
- The cart or session. Line items, quantities, discounts and shipping selections, held by your commerce backend and reachable through an API.
- The payment layer. Where card data is actually collected and tokenized. This is the part PCI DSS cares about, and it is never something you should build from scratch: it is always a payment processor's SDK, hosted page, or API underneath.
- The confirmation step. A webhook or redirect that tells your backend the payment succeeded, so it can create the order, decrement inventory and trigger fulfillment.
What changes between patterns is only the payment layer: how much of its UI you own, and therefore how much PCI DSS scope lands on your team.
The Three Headless Checkout Patterns
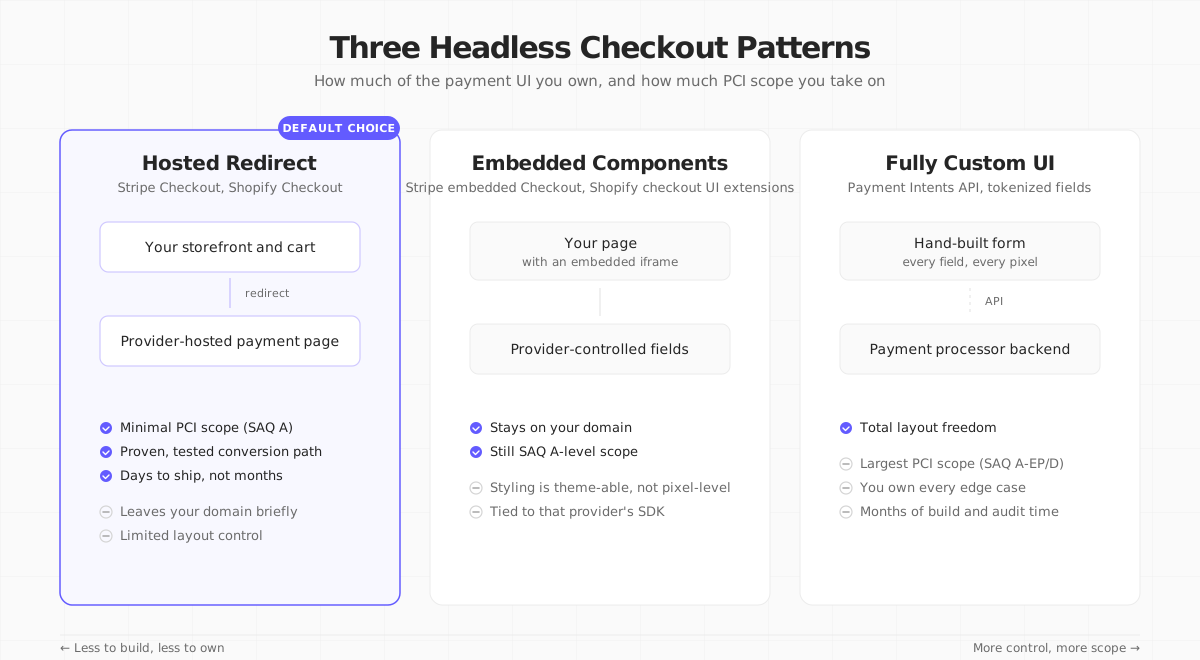
1. Hosted redirect
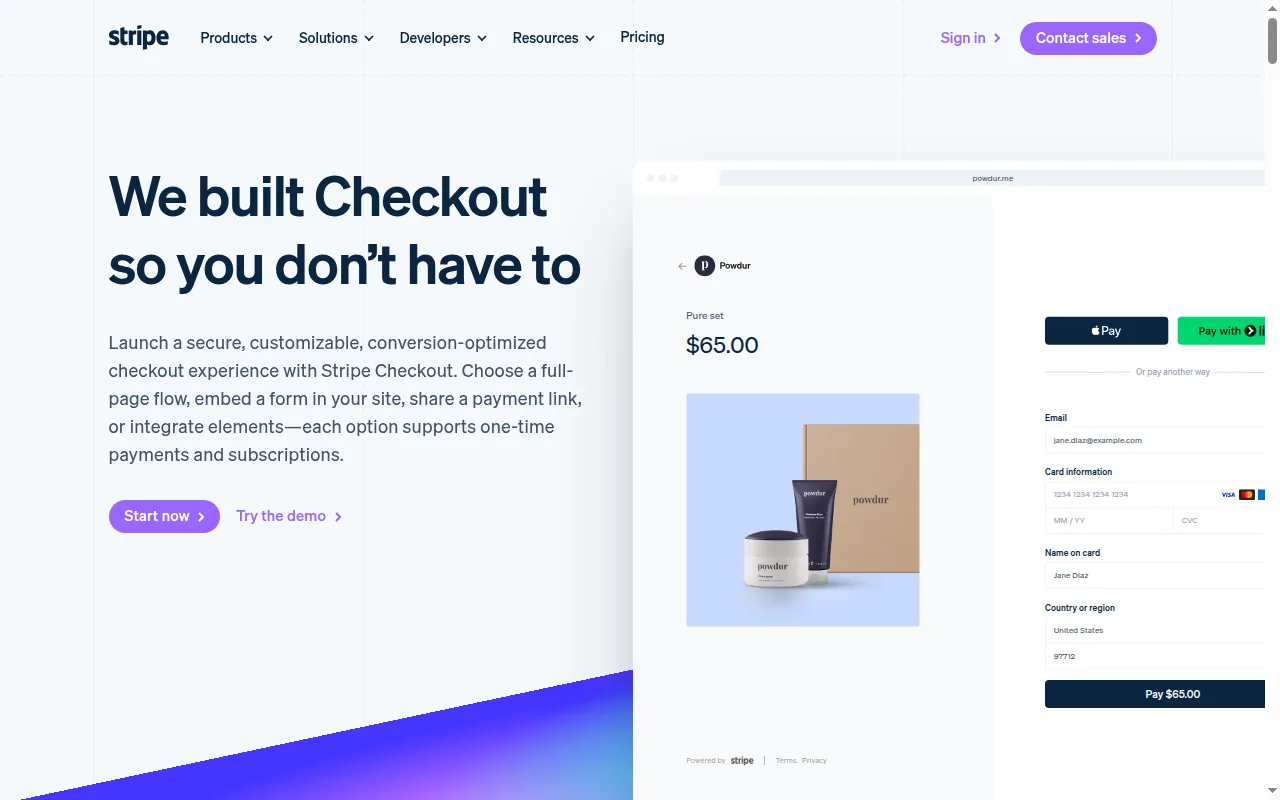
The frontend sends the cart to the payment provider, which returns a URL; the shopper is redirected to a page the provider hosts and controls, like Stripe Checkout or Shopify's checkout. After payment, the shopper is redirected back to your confirmation page.
- PCI scope: Minimal (SAQ A). Card data never touches your servers or your frontend code at all.
- Effort: Low. Usually a single API call to create a session and a redirect.
- Trade-off: The shopper briefly leaves your domain, and you cannot restyle every pixel, only branding, colors and a logo.
2. Embedded components
The payment provider's fields render inside your page, usually in a sandboxed iframe, so the URL never changes and the shopper never leaves your site. Stripe's embedded Checkout and Shopify's checkout UI extensions both work this way.
- PCI scope: Still minimal (SAQ A), because the sensitive fields are isolated in the provider's iframe even though they visually sit on your page.
- Effort: Medium. You style around the embed and handle the surrounding page state, but the payment form itself is the provider's code.
- Trade-off: Layout freedom is real but bounded. You are customizing a component, not building a form.
3. Fully custom UI
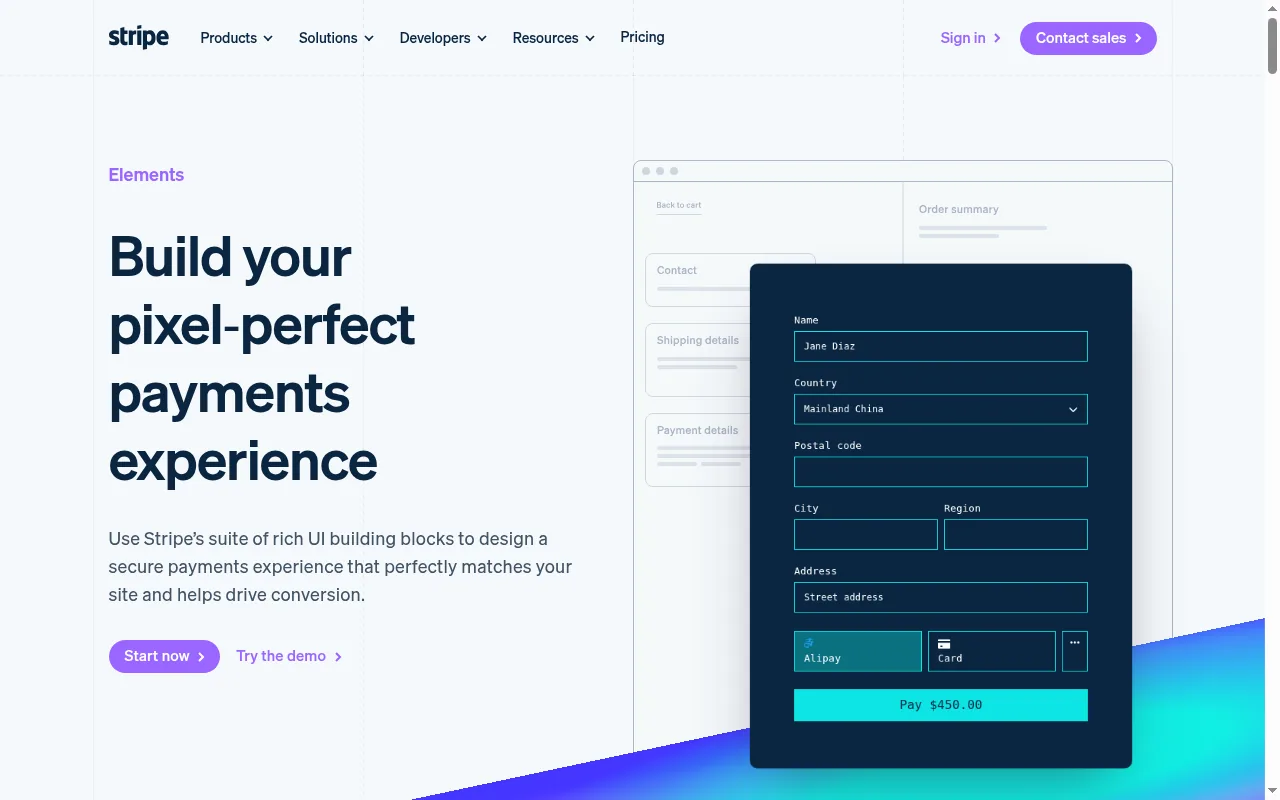
You build the entire payment form yourself: every input, every validation message, every loading state. Card details are tokenized client-side through something like Stripe's Payment Intents API before ever reaching your server, then your backend confirms the charge.
- PCI scope: Larger (typically SAQ A-EP, sometimes higher depending on how card data flows through your page). Tokenization keeps raw card numbers off your servers, but your JavaScript is now part of the compliance boundary.
- Effort: High. Expect weeks, not days, plus an annual PCI self-assessment.
- Trade-off: Total control over every pixel and every step, at the cost of owning every edge case: 3D Secure prompts, wallet buttons, retry logic, accessibility.
Most teams overestimate how much control they need. A hosted redirect or an embedded component handles 3D Secure, wallets, retries and localization for you. Reach for a fully custom UI only when the checkout experience itself is your product's differentiator.
Headless Checkout vs Traditional Checkout
| Traditional checkout | Headless checkout | |
|---|---|---|
| Where it lives | Platform's own page and domain | Any frontend, triggered from anywhere |
| Entry points | "Add to cart" flow only | Product page, chat, subscription portal, in-app |
| Ownership | Platform decides the layout | You decide the layout (within the pattern's limits) |
| PCI burden | Handled entirely by the platform | Depends on pattern: SAQ A to SAQ A-EP+ |
| Build cost | Included | Hours (hosted) to weeks (custom) |
Why Teams Go Headless on Checkout
- Multiple entry points. A subscription management portal, a mobile app and a marketing landing page can all trigger the same checkout without duplicating logic.
- Faster experiments. You can A/B test the surrounding page (upsells, trust badges, order summary layout) without touching the payment code at all.
- One backend, many storefronts. If you already run a headless commerce architecture, checkout needs to be reachable the same way: through an API, not a template.
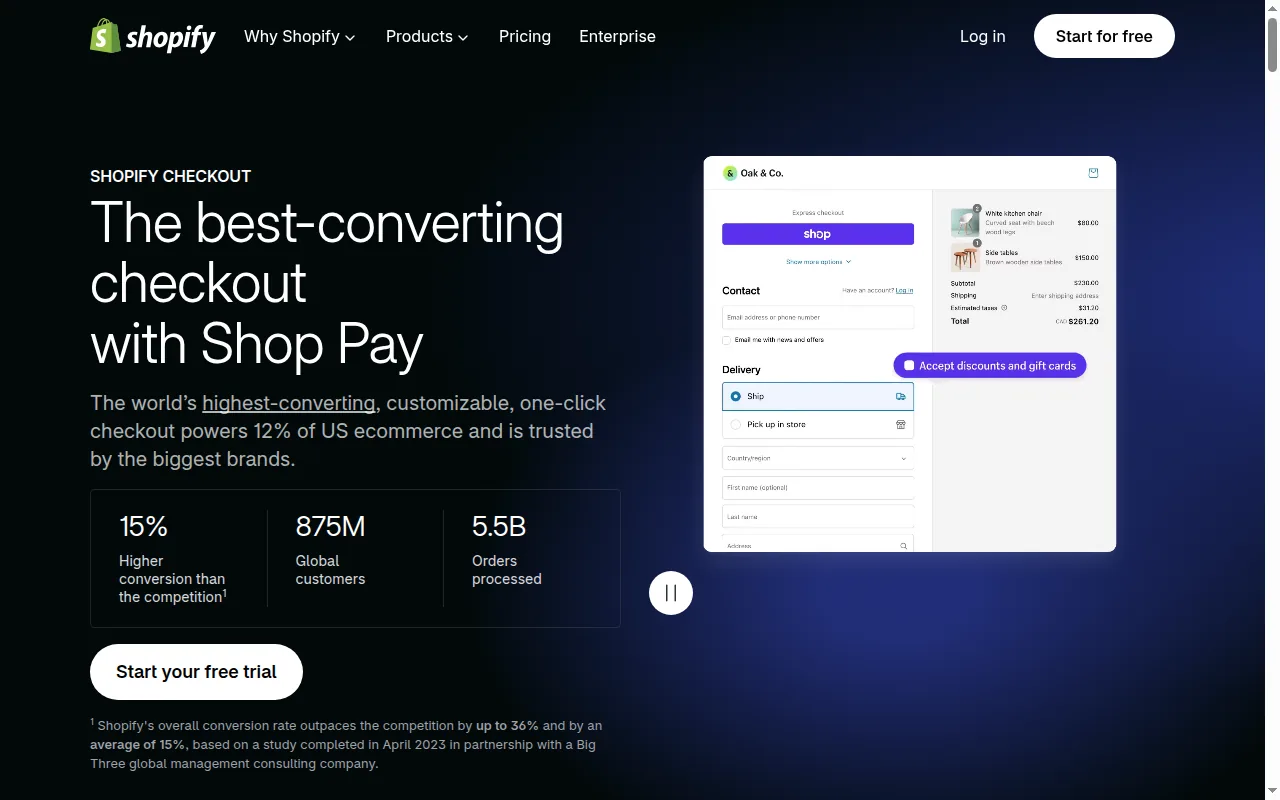
- Higher-converting defaults. Shopify reports its checkout, backed by Shop Pay, converts up to 36% better than the competition and processes over 5.5 billion orders a year, evidence that a proven, hosted checkout is not a compromise so much as a starting point most teams should not rebuild from scratch.
Which Headless Checkout Should You Choose?
| Your situation | Recommended pattern |
|---|---|
| Launching fast, small team, no dedicated payments engineer | Hosted redirect. Ship in days, inherit the provider's conversion testing and fraud tooling. |
| Need checkout to feel native to your site, but don't want PCI exposure | Embedded components. Same domain, same PCI scope as hosted, more design control. |
| Checkout itself is a core product differentiator (a marketplace, a highly custom multi-step flow, a native mobile checkout) | Fully custom UI. Only worth it when the control is the point, not a preference. |
| Multi-tenant platform serving many merchants | Hosted or embedded, almost always. A custom UI means re-auditing PCI scope for every merchant's implementation. |
A rule of thumb: default to hosted, upgrade to embedded when the redirect genuinely hurts conversion or trust, and reserve fully custom for cases where the checkout experience is the thing you are actually selling.
How Your Next Store Fits
Your Next Store takes the hosted-redirect approach on purpose. The storefront, cart and product catalog are fully custom, a Next.js 16 template with React Server Components that you can restyle completely, but the payment step itself hands off to Stripe Checkout Sessions: a hosted, PCI-compliant page you never have to build or audit.
- Full storefront control. Everything up to checkout, including your entire product browsing, search and cart experience, is your codebase.
- Zero PCI burden. Card data never touches your servers; Stripe's hosted page handles tokenization, 3D Secure and wallets.
- A real commerce backend. Carts, orders, inventory and customers live in YNS's PostgreSQL backend, reached through the Commerce Kit SDK, not stitched together from separate services.
- 0% platform transaction fees. Plans start at $30/mo; only Stripe's own processing fees apply.
A custom storefront without a custom PCI audit. YNS gives you a fully headless Next.js storefront with checkout handled by Stripe's hosted, battle-tested flow.
Your Next Store is open source. Star the repo on GitHub: github.com/yournextstore/yournextstore
FAQ
Is headless checkout PCI compliant?
It depends entirely on the pattern. Hosted redirects and embedded components keep you at the lowest PCI tier (SAQ A) because card data never reaches your code. A fully custom UI is still compliant if you tokenize correctly, but it moves you to a larger self-assessment (typically SAQ A-EP) because your JavaScript is now part of the payment flow.
Does headless checkout hurt conversion?
Not inherently. Shopify's own data shows its hosted checkout converting up to 36% better than the competition, so a well-built hosted or embedded checkout usually converts as well as, or better than, a from-scratch custom form. The risk is a badly optimized redirect (slow, off-brand, unclear), not the headless part itself.
Can I have a headless checkout without a headless storefront?
Yes. You can keep a traditional theme-based storefront and still trigger checkout from a non-standard place, a "buy now" button in an email or a QR code at an event, using a hosted checkout link. Headless checkout and headless commerce usually travel together but are not the same decision.
The Bottom Line
Headless checkout is not one thing to build; it is a choice between three patterns that trade control for PCI scope and engineering time. Start with a hosted redirect unless you have a specific reason not to, move to embedded components when the redirect costs you trust or brand consistency, and reserve a fully custom UI for the rare case where the checkout experience itself is the product. Most stores never need to leave the first option.