Design with the AI builder
Describe how you want your store to look in plain language, watch it change in a live preview, then publish when you love it.
The AI builder is the easiest way to shape how your store looks. Instead of digging through theme settings or touching any code, you describe what you want in plain language — and the builder rebuilds that part of your store while you watch in a live preview.
It's like having a web designer on call: tell it what you have in mind, see the result in seconds, and keep refining until it's exactly right.
How it works
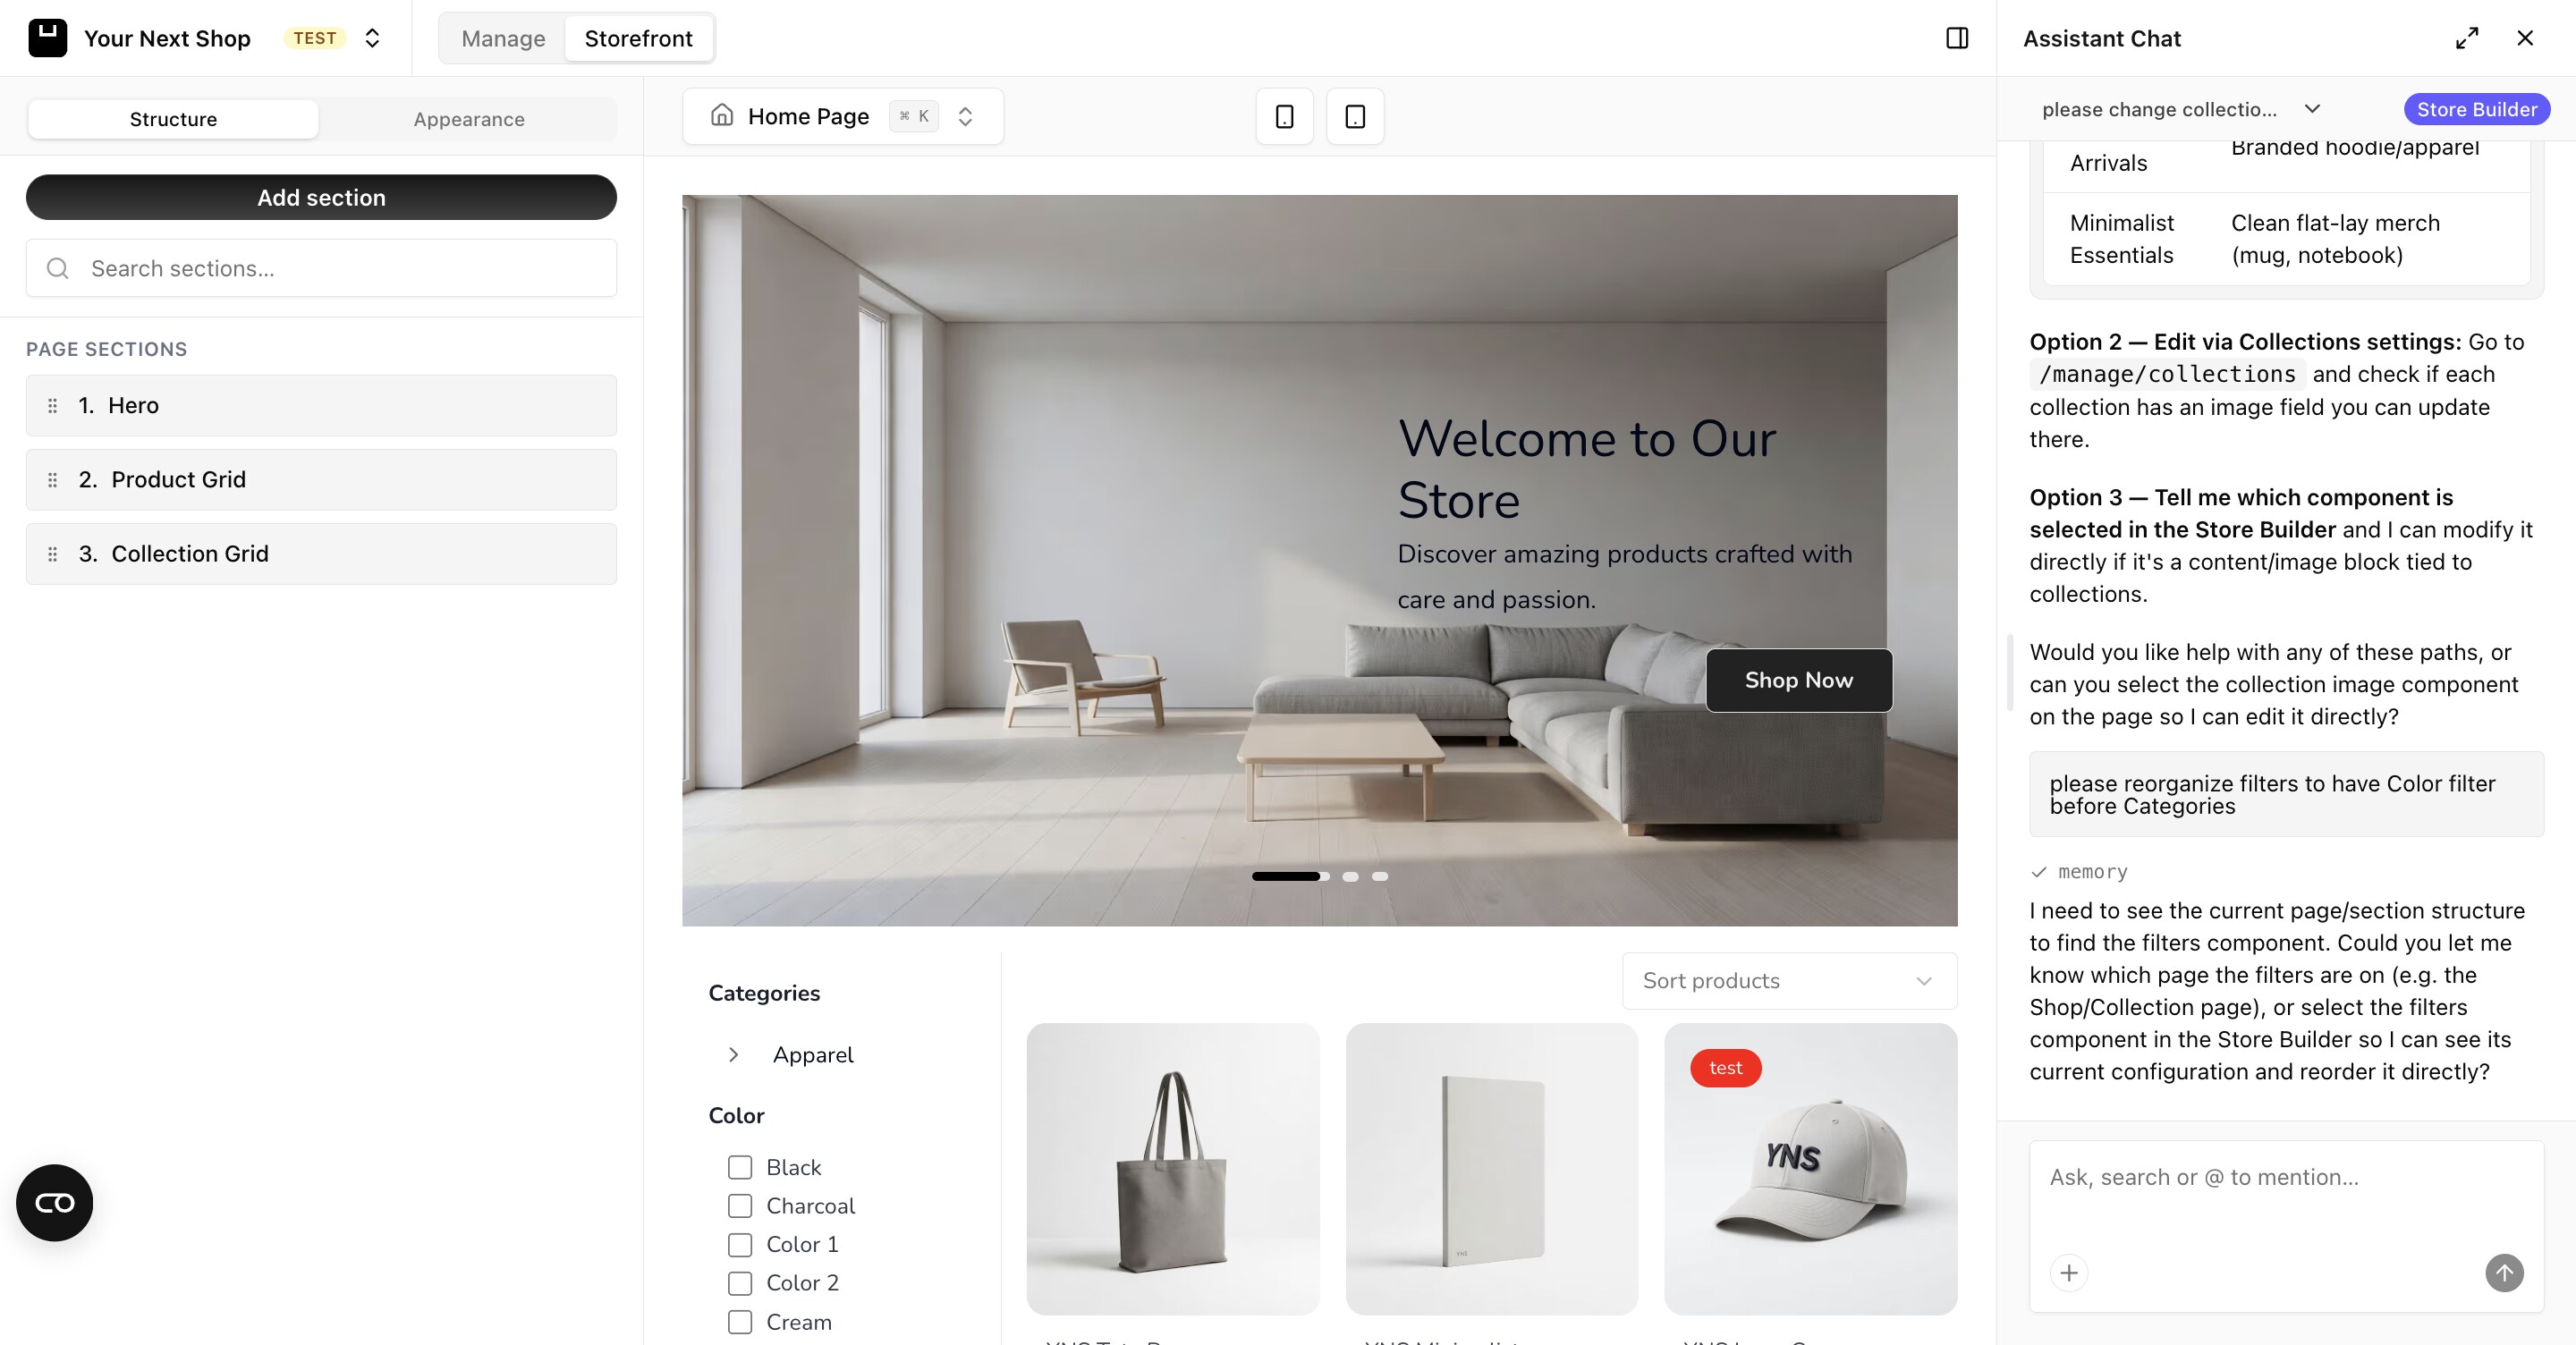
Open the Design area of your dashboard. You'll see a live preview of your store next to a chat box (the Builder Chat). Type what you'd like to change, the builder makes it, and the preview updates so you can see the result right away.
If it's not quite right, just keep chatting to refine it — the builder remembers what you're working on and builds on top of your previous requests.
Builder vs. Assistant. The AI builder changes how your store looks — layout, colors, sections, fonts. The AI Assistant runs your store — products, orders, and settings. The chat panel shows the AI Assistant everywhere in your dashboard; when you open the Design area, the same panel switches to the Builder for design work.
What the AI builder can do
This is much more than swapping a few colors. The builder has full creative control over your storefront and can:
| Area | Examples of what you can ask for |
|---|---|
| Layout & structure | Rearrange sections, add a new section, remove one, change the order of the page |
| Homepage design | Custom hero banners, product grids, feature highlights, testimonials, announcement bars |
| Colors & theme | Change your palette, make it warmer or bolder, adjust buttons, borders, and rounded corners |
| Typography | Switch to a different font, make headings bigger or friendlier, match a brand font |
| Pages | Add pages like About or FAQ, and rewrite the content on them |
| Images & video | Add hero images, lifestyle photos, banners, and video headers — generated for you or sourced for you |
| Whole-store styling | Apply a cohesive look across every page — home, product, collection, and cart |
Whatever you ask for is applied across your whole store so it feels cohesive — not just on the homepage.
Step 1: Open the design builder
Go to the Design area in your dashboard. Your store appears in a live preview beside the chat. Everything is already set up — you can start typing straight away.
Step 2: Describe what you want
Type your request in plain words. The more specific you are, the better the result. Here are examples grouped by what you might want to do.
Set the overall look
- "Make the store feel warm and handmade, with soft rounded corners and a cream background."
- "Give it a bold, modern luxury feel — lots of black, white, and generous spacing."
Change a specific section
- "Make the homepage hero bigger and add a photo of a candle in a cozy room."
- "Move the newsletter signup to the bottom of the page."
- "Add a row of customer testimonials under the products."
Adjust colors, fonts, and details
- "Use a rounder, friendlier font for the headings."
- "Make the buttons dark green and a bit larger."
- "Add a thin announcement bar at the top that says 'Free shipping over $50'."
Tip: Name the section, the look you want, and any colors or wording. "Make the buttons dark green and a bit larger" works far better than "change the buttons." If you're not sure what you want, just describe the feeling — "cozy", "premium", "playful" — and let the builder make the first move.
Step 3: Use your brand kit (optional)
If you have brand guidelines — a PDF or an image with your colors, fonts, and logo — you can upload them so the builder follows your brand automatically. Once your brand kit is set, every design choice respects your colors, typography, and tone without you repeating them each time.
You can also just tell it: "My brand color is #1F6F54 and the logo is the one I uploaded — use those everywhere."
Step 4: Add images and video
You don't need your own photography to get a rich, visual store. Ask the builder to add visuals and it will generate or source appropriate images for you:
- "Add a full-width hero image that fits a candle brand."
- "Put lifestyle photos in the 'Our story' section."
- "Add a short looping video at the top of the homepage."
Product photos you've already uploaded are used automatically wherever products appear.
Step 5: Keep refining
Design is back-and-forth. Try a change, see how it looks in the preview, then ask for a tweak. Repeat until you're happy — there's no limit to how many changes you can make.
Tip: If a change doesn't seem to appear, click the Refresh button above the preview. The preview doesn't always reload on its own.
Step 6: Publish when you're happy
Your changes appear in the preview first — your live store doesn't change until you choose to publish. When everything looks the way you want, publish so your customers see the new design. Your previous versions are kept, so it's safe to experiment.
See Publish and go live for more on going live.
Tips for great results
- One idea at a time for big changes, so it's easy to see what each request did. You can batch small tweaks together.
- Describe the goal, not the code. You never need technical words — "make it feel more premium" is a perfectly good instruction.
- Reference real things. Mention your brand, your products, or a store you admire ("clean like an Apple page") to steer the style.
- It's safe to experiment. Nothing is public until you publish, and earlier versions are kept.
FAQ
Do I need to know how to code?
No. The whole point of the builder is that you describe what you want in plain language. It writes and changes everything behind the scenes for you.
Will my changes go live immediately?
No. Changes show in the preview only. Your live store updates when you publish, and you can review everything first.
Can it undo a change I don't like?
Yes — just ask it to revert, or describe what you'd rather have instead. Earlier versions of your store are kept, so you can always go back.
What's the difference between the builder and a theme?
A theme is a ready-made look you apply in one click — a great starting point. The AI builder lets you customize and go beyond any theme by describing exactly what you want. Many merchants start with a theme, then use the builder to make it their own.
Can the builder add products or change prices?
The builder focuses on how your store looks. For managing your catalog and prices, use the AI Assistant — that's what it's built for, alongside your orders and settings.
What's next
- Want a quick starting point? See Choose and apply a theme.
- Set your visual identity in Set your logo and branding.
- Run the rest of your store by chat with the AI Assistant.